
Kiwi Coconut Agar Agar Jelly

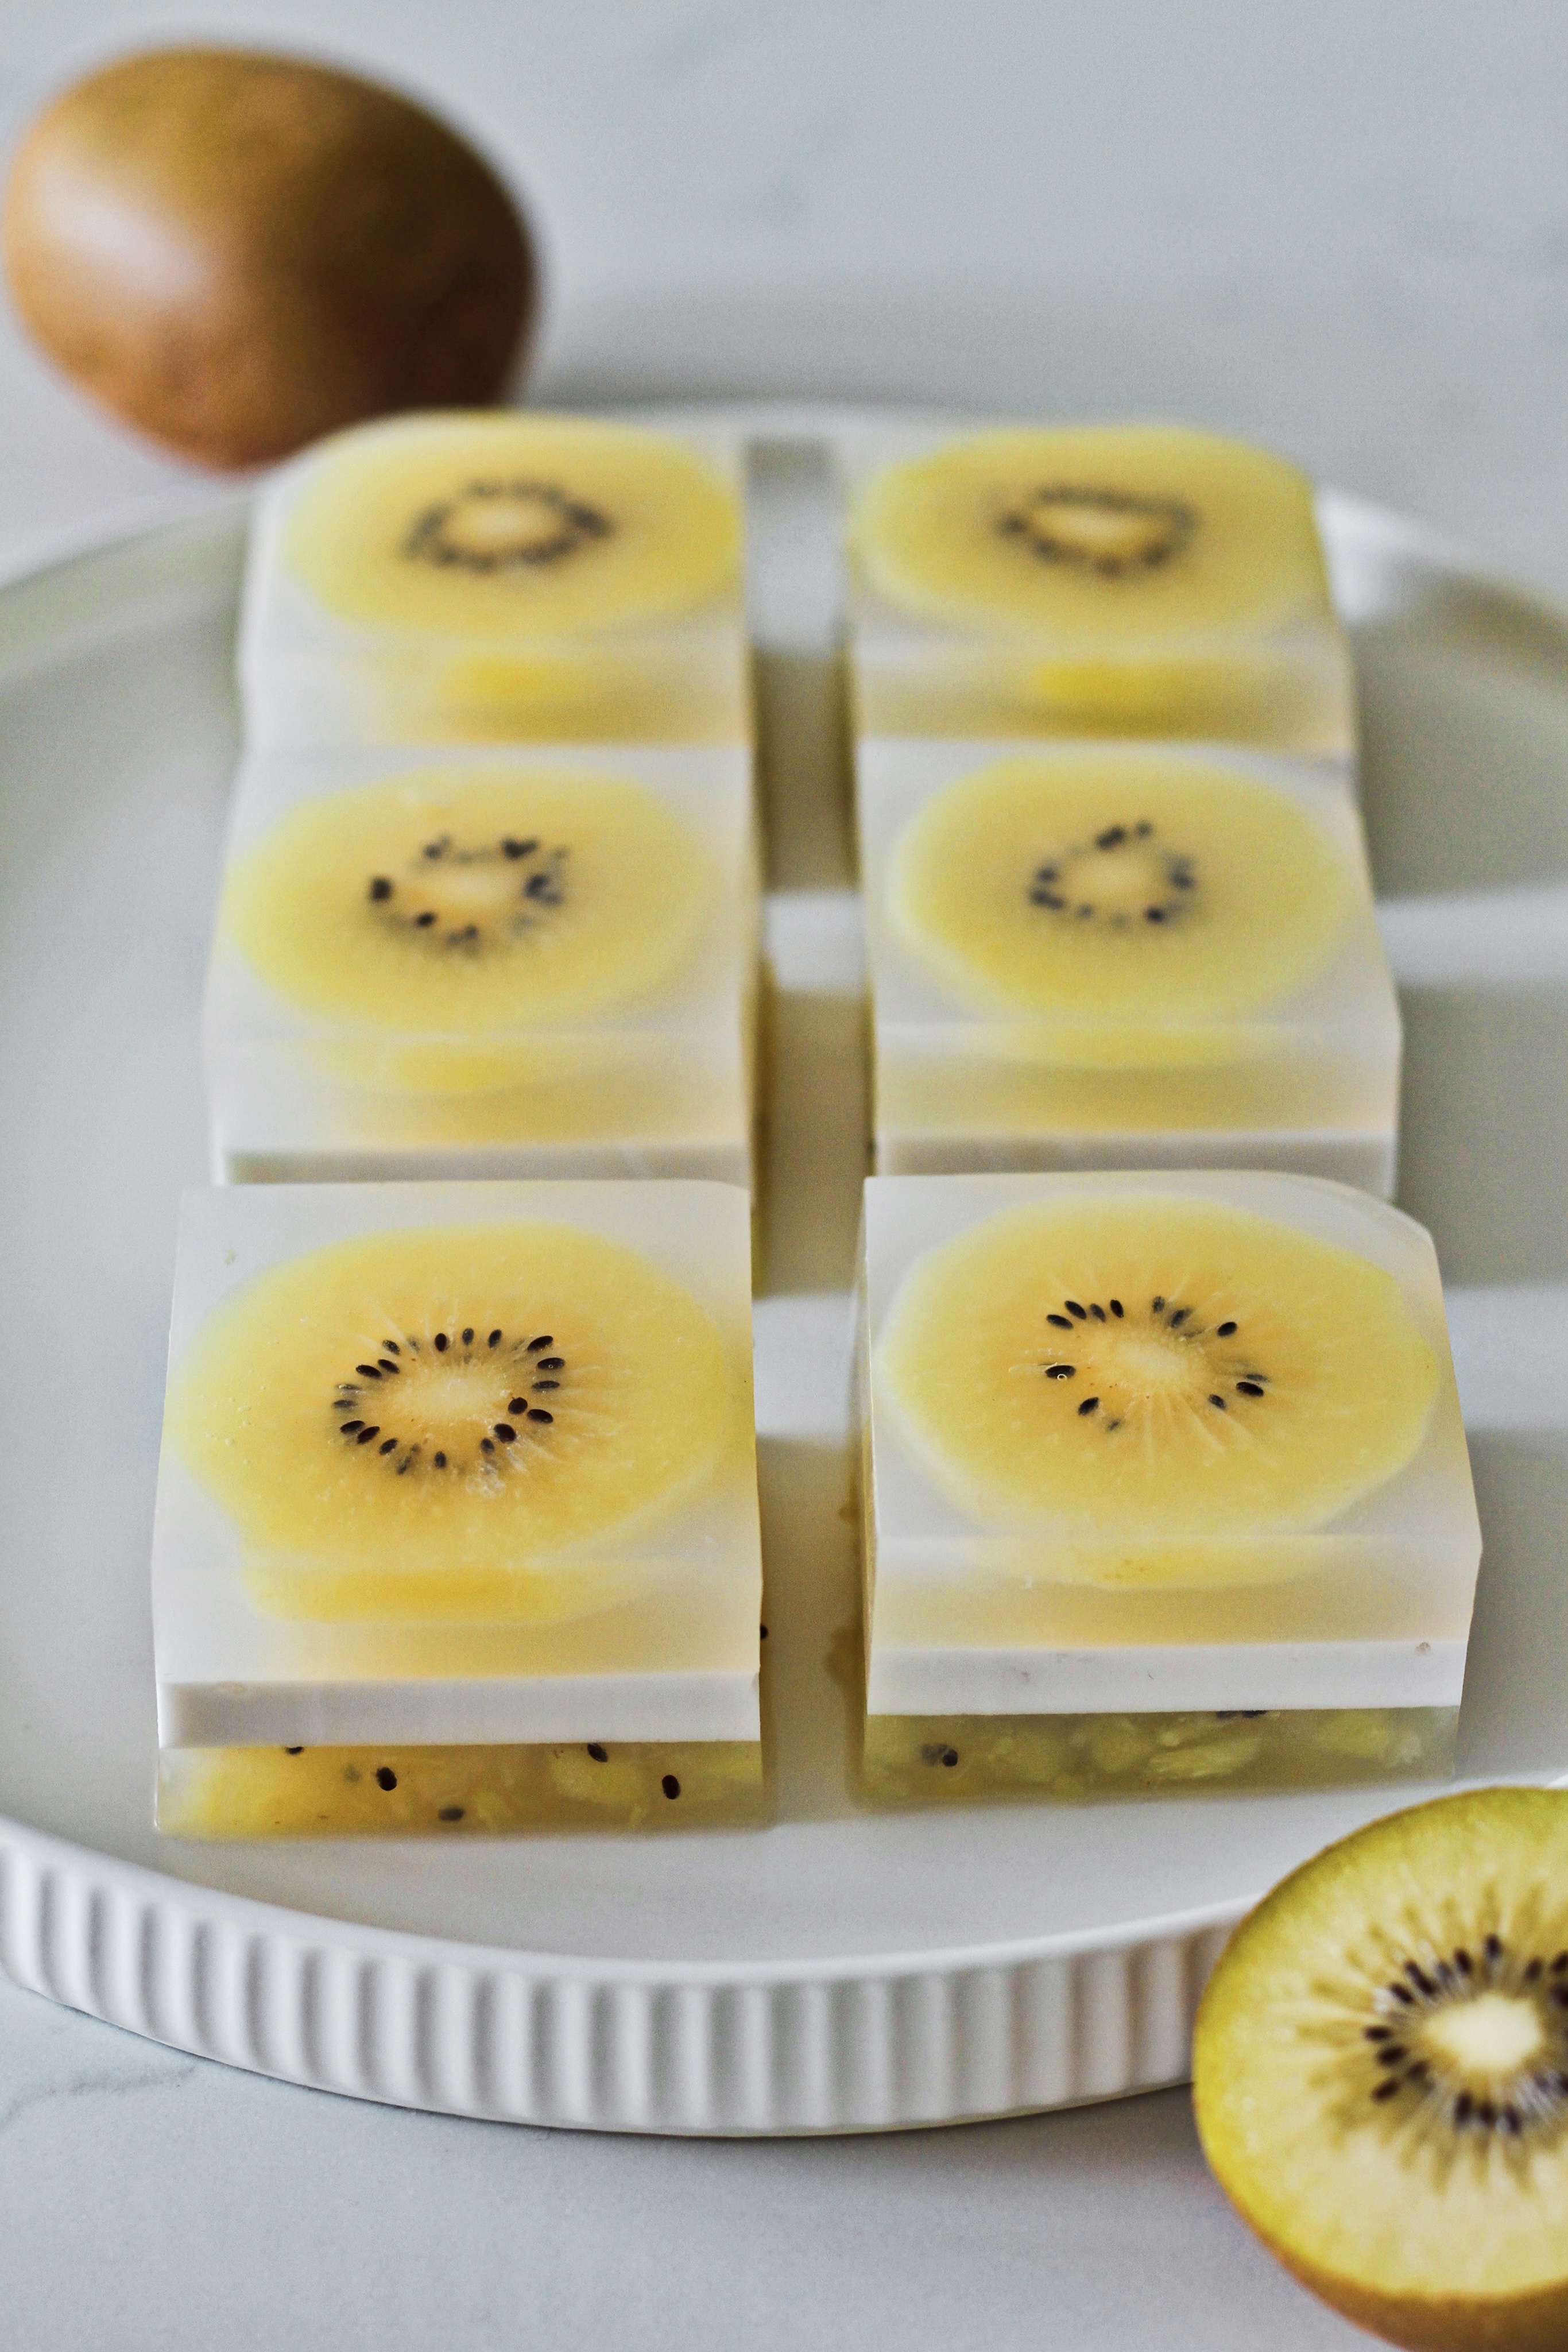
These cutest layered agar agar jellies are the perfect balance of sweet and refreshing. They're 100% plant-based and vegan, gluten-free, dairy-free, and refined sugar-free. Plus they're super easy to make, all you need is a pot and a fridge, no baking needed!


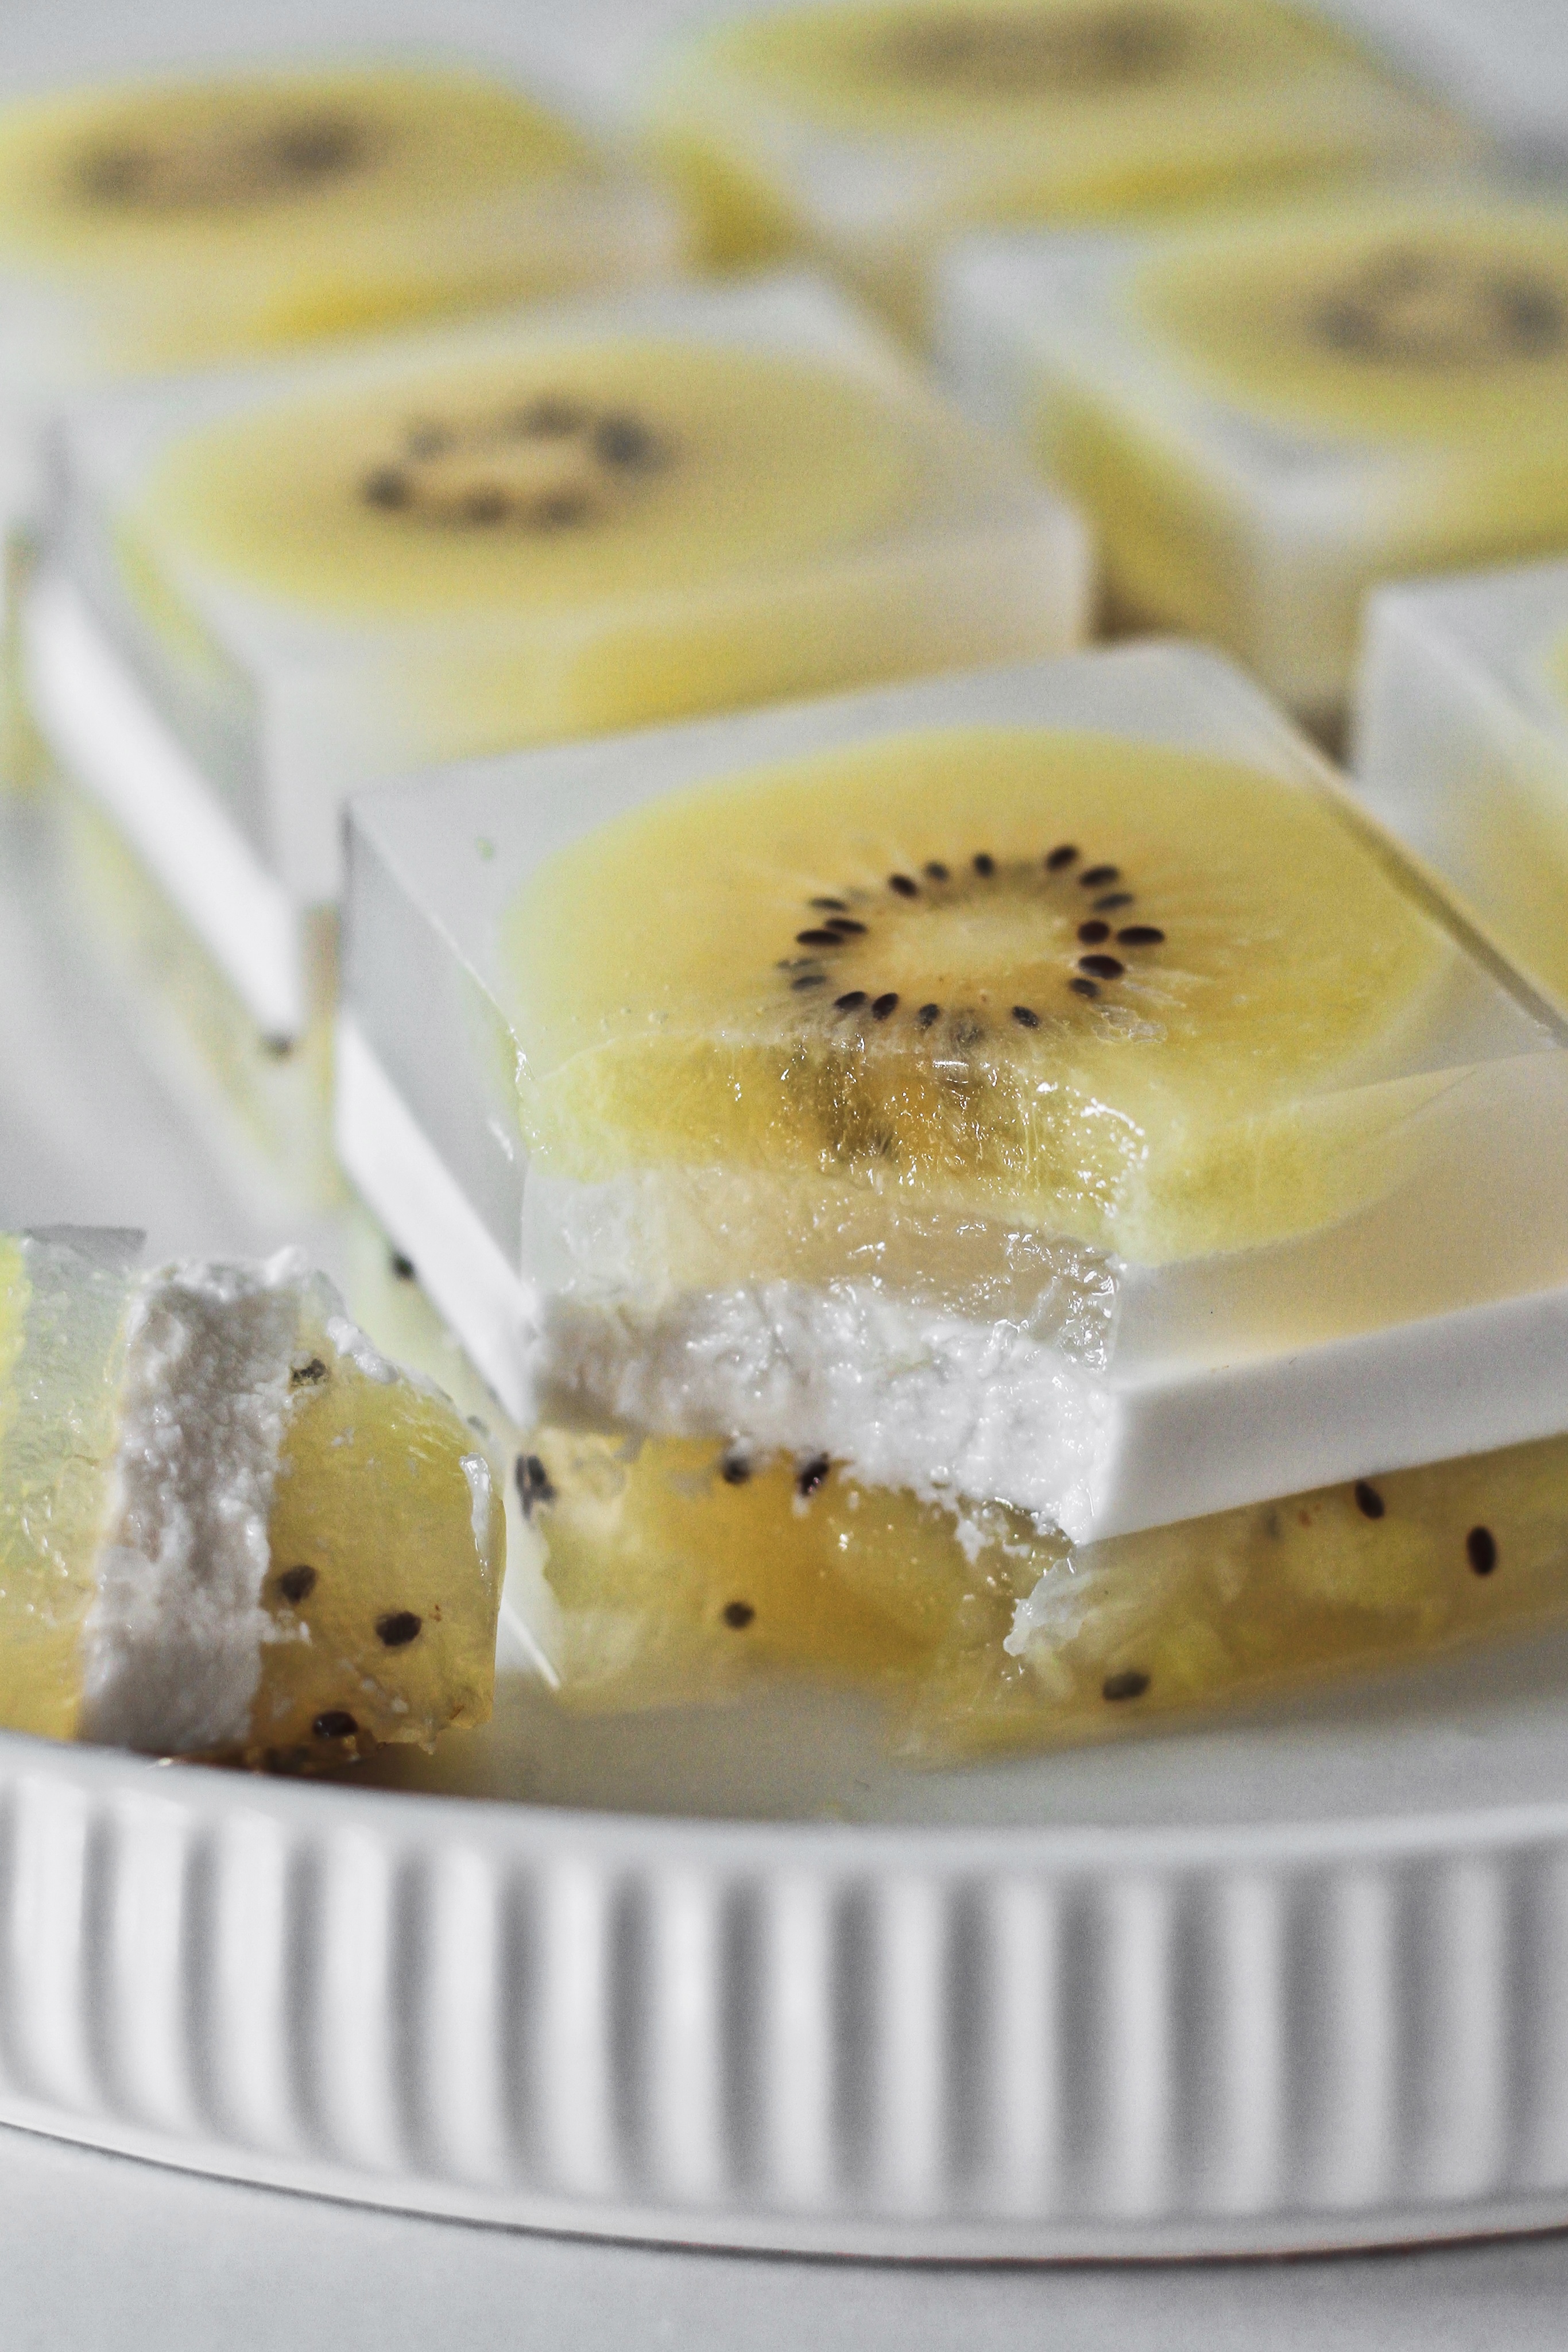
Whatever the weather, I can never say no jellies! Especially a layered one, they're not only easier on the eyes but also provide some delightful varieties in the flavors and depth in the textures, like this kiwi and coconut combo, one is sweet and tart, the other is rich and creamy - yes you can say they complete each other :)

Most commonly, jellies are made of gelatin, which is extracted from animal bones and skin, I know, yuck. However, to make them vegan couldn't be easier, simply swap out gelatin with agar agar! Agar agar is made from the cell walls of algae and it is widely used in Asia, in Japan it's Kanten, in China it's used to make Liang Fen, both sweet and savory, and in Southeast Asian countries it's used to make pandan jelly and many other types of jelly desserts.


If you've never worked with agar agar before, please read these key tips before you start:

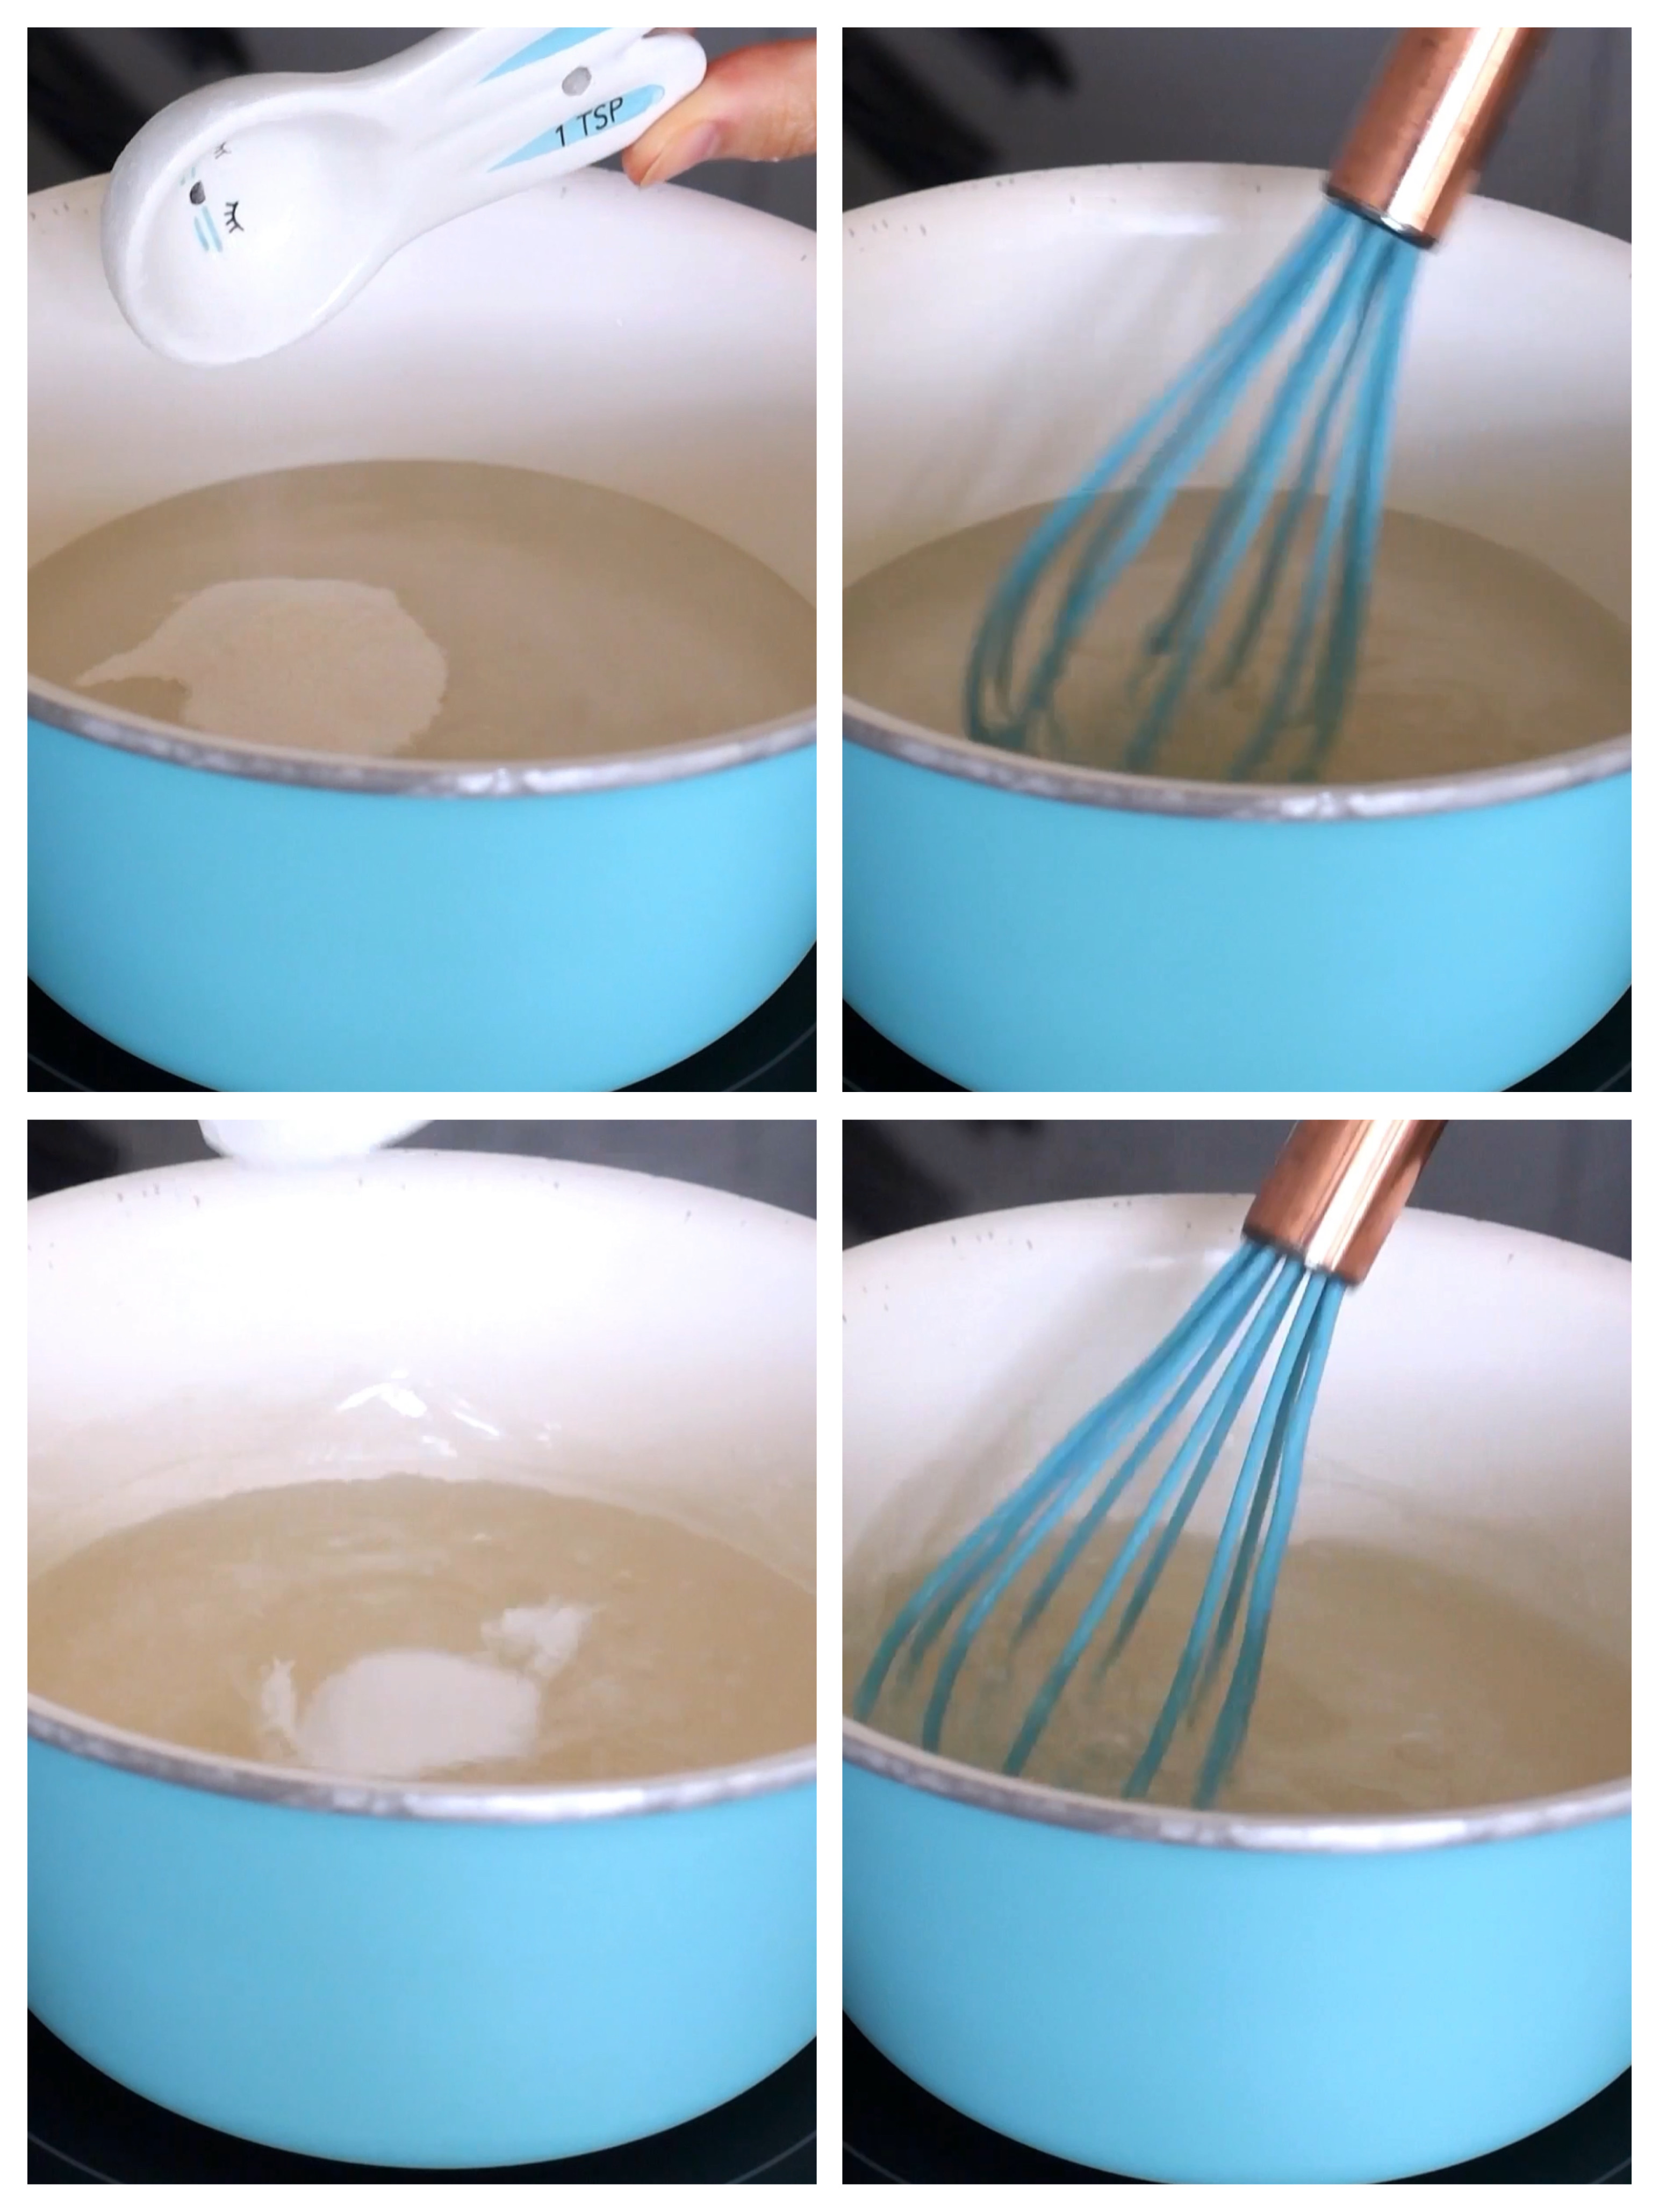
1. Agar agar needs to be brought to a full boil for it to completely dissolve. I strongly recommend always dissolve the agar agar powder in clear water first before you add any colored ingredients, milk, juicy, fruit puree etc, just so you can clearly see whether there are still little particles left undissolved;

2.Agar jelly sets at room-temperature and it sets fast. Unlike gelatin which takes hours to set in the fridge, agar agar jelly starts to solidify even at room temperature. Once it's cooled you can of course transfer it to the fridge to further set, and depending on the size of the mold, it usually only needs about 30 minutes in the fridge. Also, for this exact reason, be sure to work fast with your agar agar liquid before it starts to become solid. IF this happens, don't panic either, just heat it up again to melt it then continue pouring it into mold;


3. If you're trying to create layers, make sure to let each layer solidify before pouring in the next layer, however, do not let it completely set either! Otherwise, the layers wouldn't fuse completely togehter. Also, don't pour the liquid directly onto the previous layer, the pressure might result in holes or cracks, always pour the liquid onto the back of a spoon first and let it drizzle on.

Watch the video below to follow the simple steps and come find me on Instagram and Tiktok for more daily shares of plant-based food and living content.


INGREDIENTS:

For the kiwi layer -
3 gold kiwi, or green ones
1 1/3 cup water
1 teaspoon agar agar powder
1 tablespoon monk fruit extract, or other sweetener of choice

For the coconut layer -
1/3 cup full fat coconut milk from a can
1/3 cup water
1/2 teaspoon agar agar powder
1 tbsp monk furuit extract

TO MAKE:

- Make the clear layer first, in a pot, add in the water and agar agar powder, whisk till the powder is spread even before turning on the heat, if you add the agar agar powder to hot liquid it can easily clump so please start with cold water;
- Bring the mixture to a full boil over medium heat, let it simmer for 5 minutes, check carefully to make sure the powder is fully dissolved and no visible little white particles are left in there;
- Add in the sweetener, stir to dissolve;
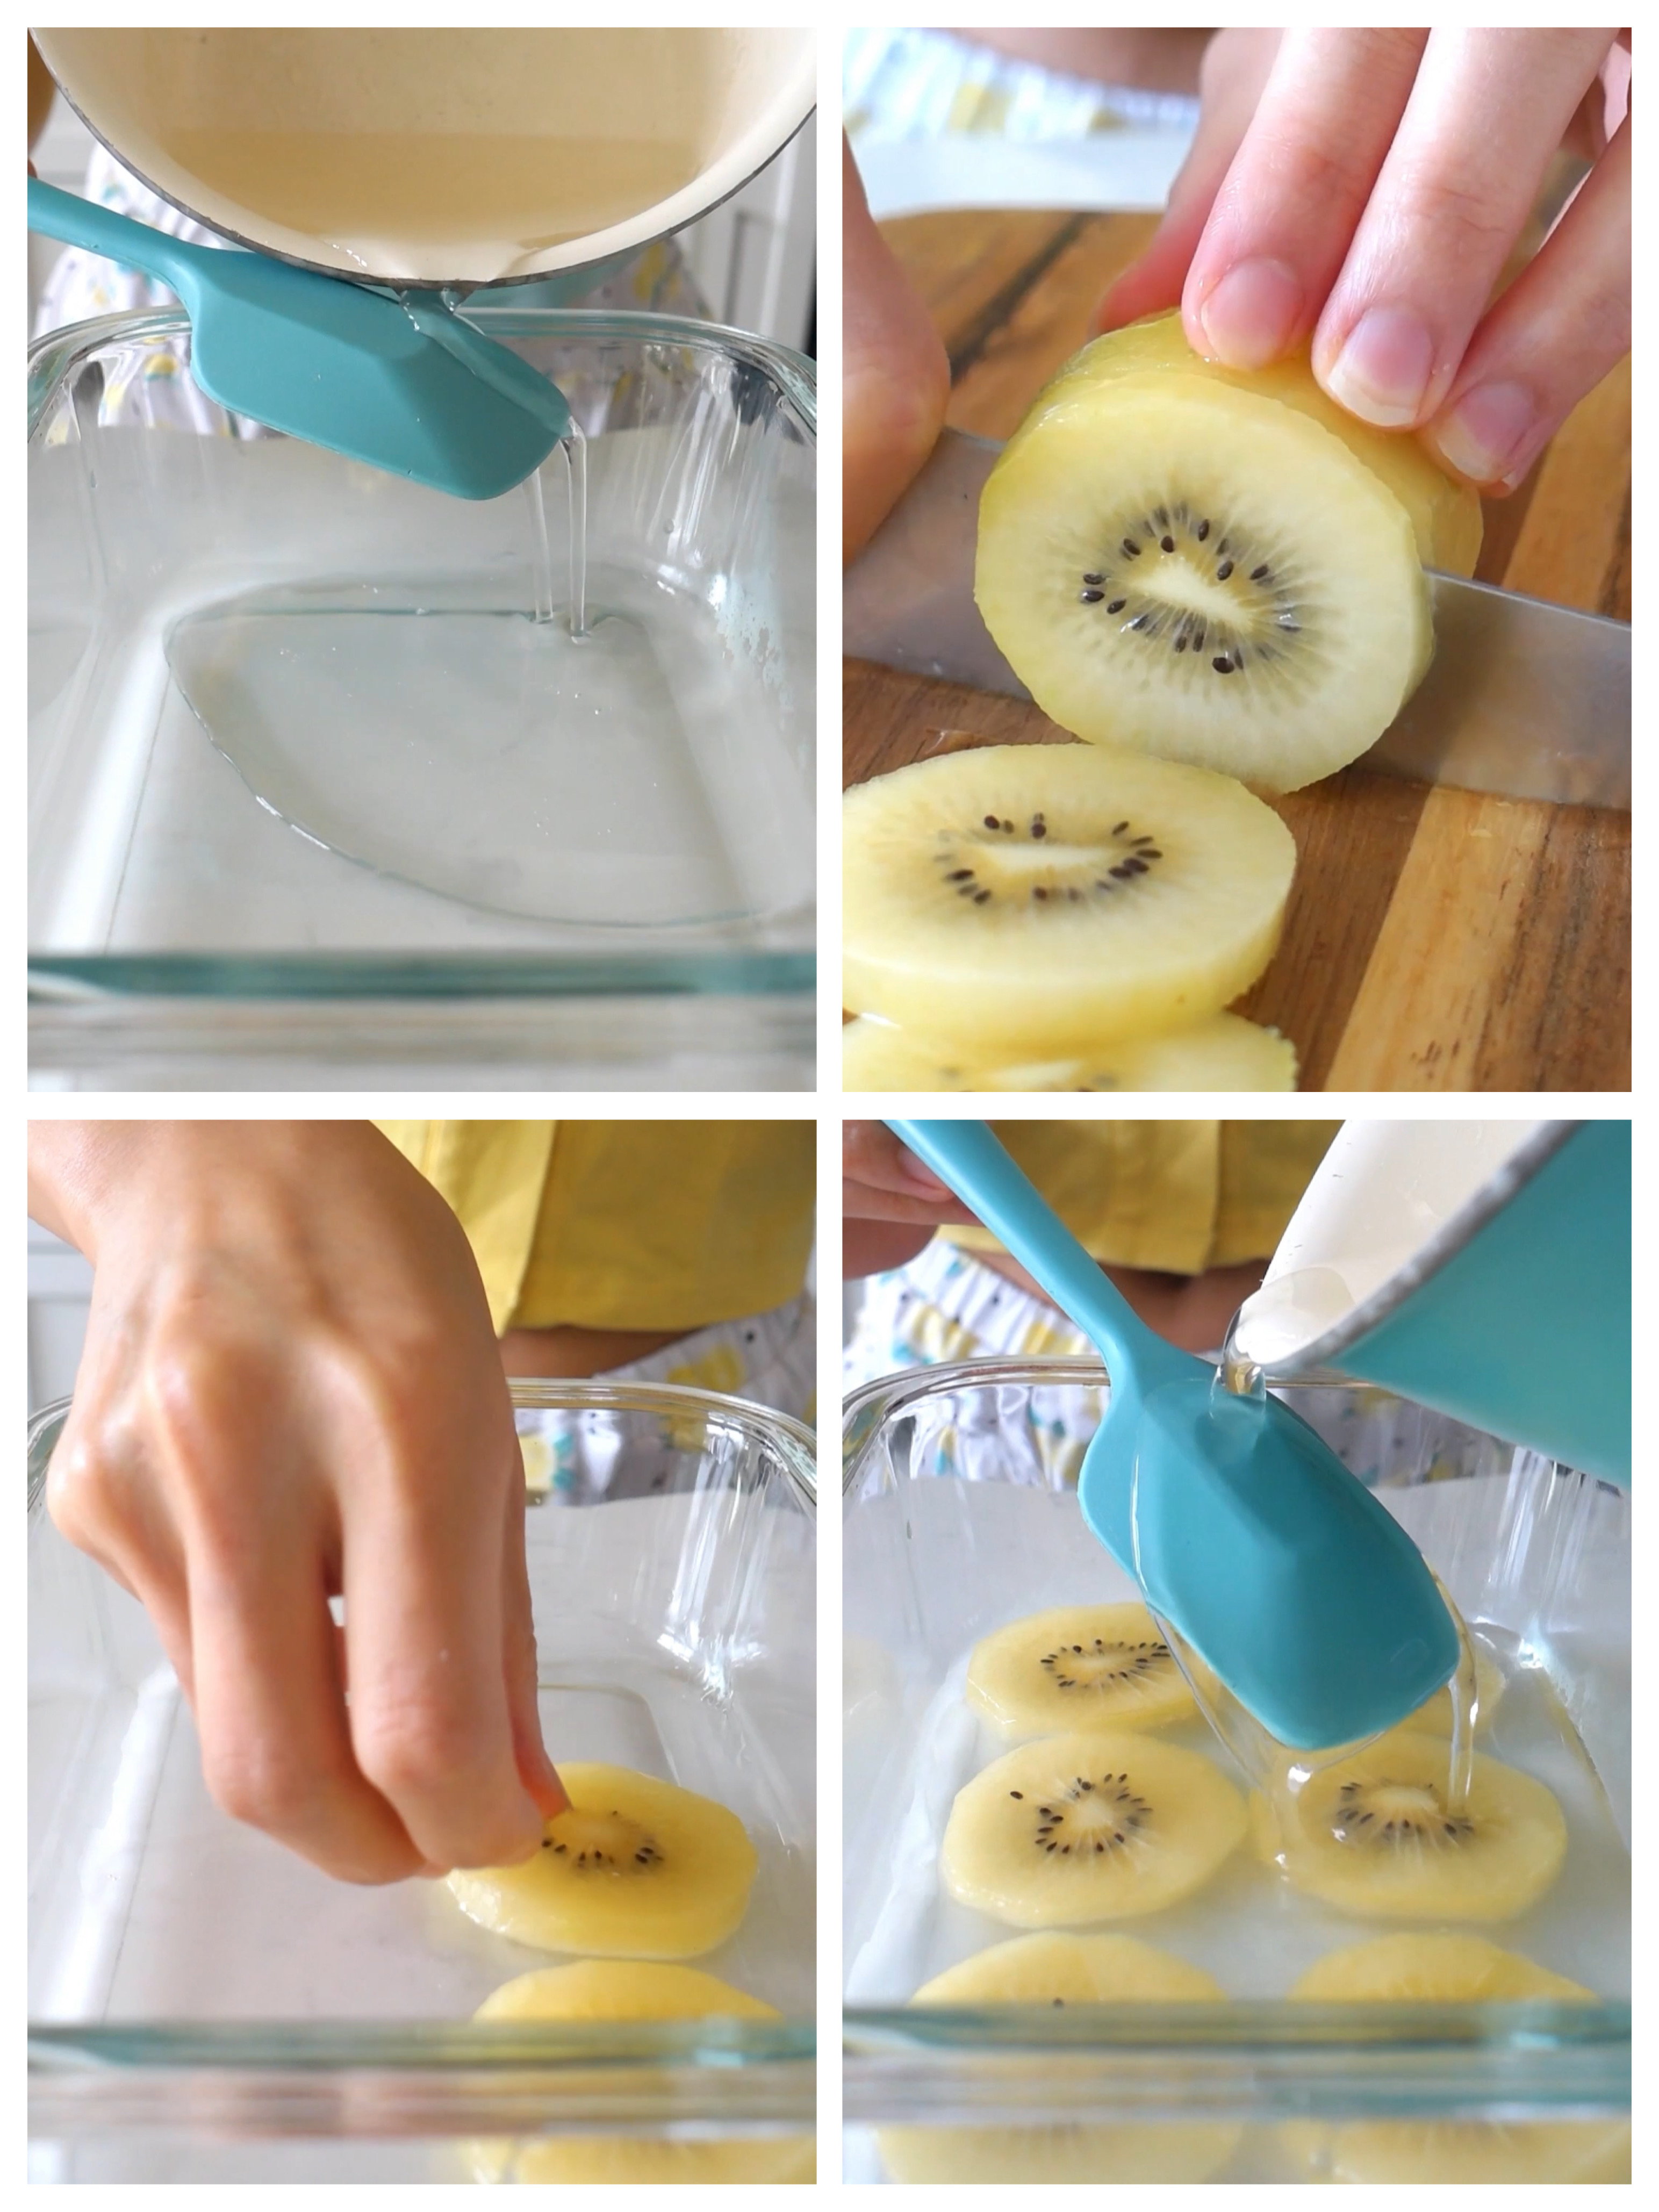
- Slice the kiwis and reserve 6 slices, chop the rest;
- Once the clear agar mixture is ready, divide it into 2 equal portions, save one portion for the final layer, keep it warm on the stove otherwise it'd solidify;
- Pour 1/3 of the first half portion of clear agar mixture into your container of choice, avoid bubbles or use a spoon to scoop the bubbles out, then lay down the kiwi slices;
- Pour the rest 2/3 of the first half portion, leave aside to set at room temperature for 20 - 30 minutes;
- Meanwhile, make the coconut layer, in another pot, mix the agar powder with cold water first;
- Then bring to a full boil, let it simmer for 5 minutes till fully dissolved before you pour in the coconut milk, stir to mix well, add sweetener, stir again to dissolve;
- Bring the mixture to a boil again, and check on your first kiwi jelly layer, the surface should be solid when you tap on it;
- Make sure the coconut mixture is very hot when you're ready to pour into the mold, this is to ensure the layers will fuse together. pour the mixture on the back of spoon then onto the first kiwi layer to prevent breaking the first layer, leave aside to set for another 20 minutes;
- When the top of the coconut layer is solid to touch, add the chopped kiwi into the second half of the clear agar mixture, pour it on top of the coconut layer over a spoon, let it cool down for 25 minutes;
- Transfer to the fridge for the jelly to further set, for another 30 minutes;
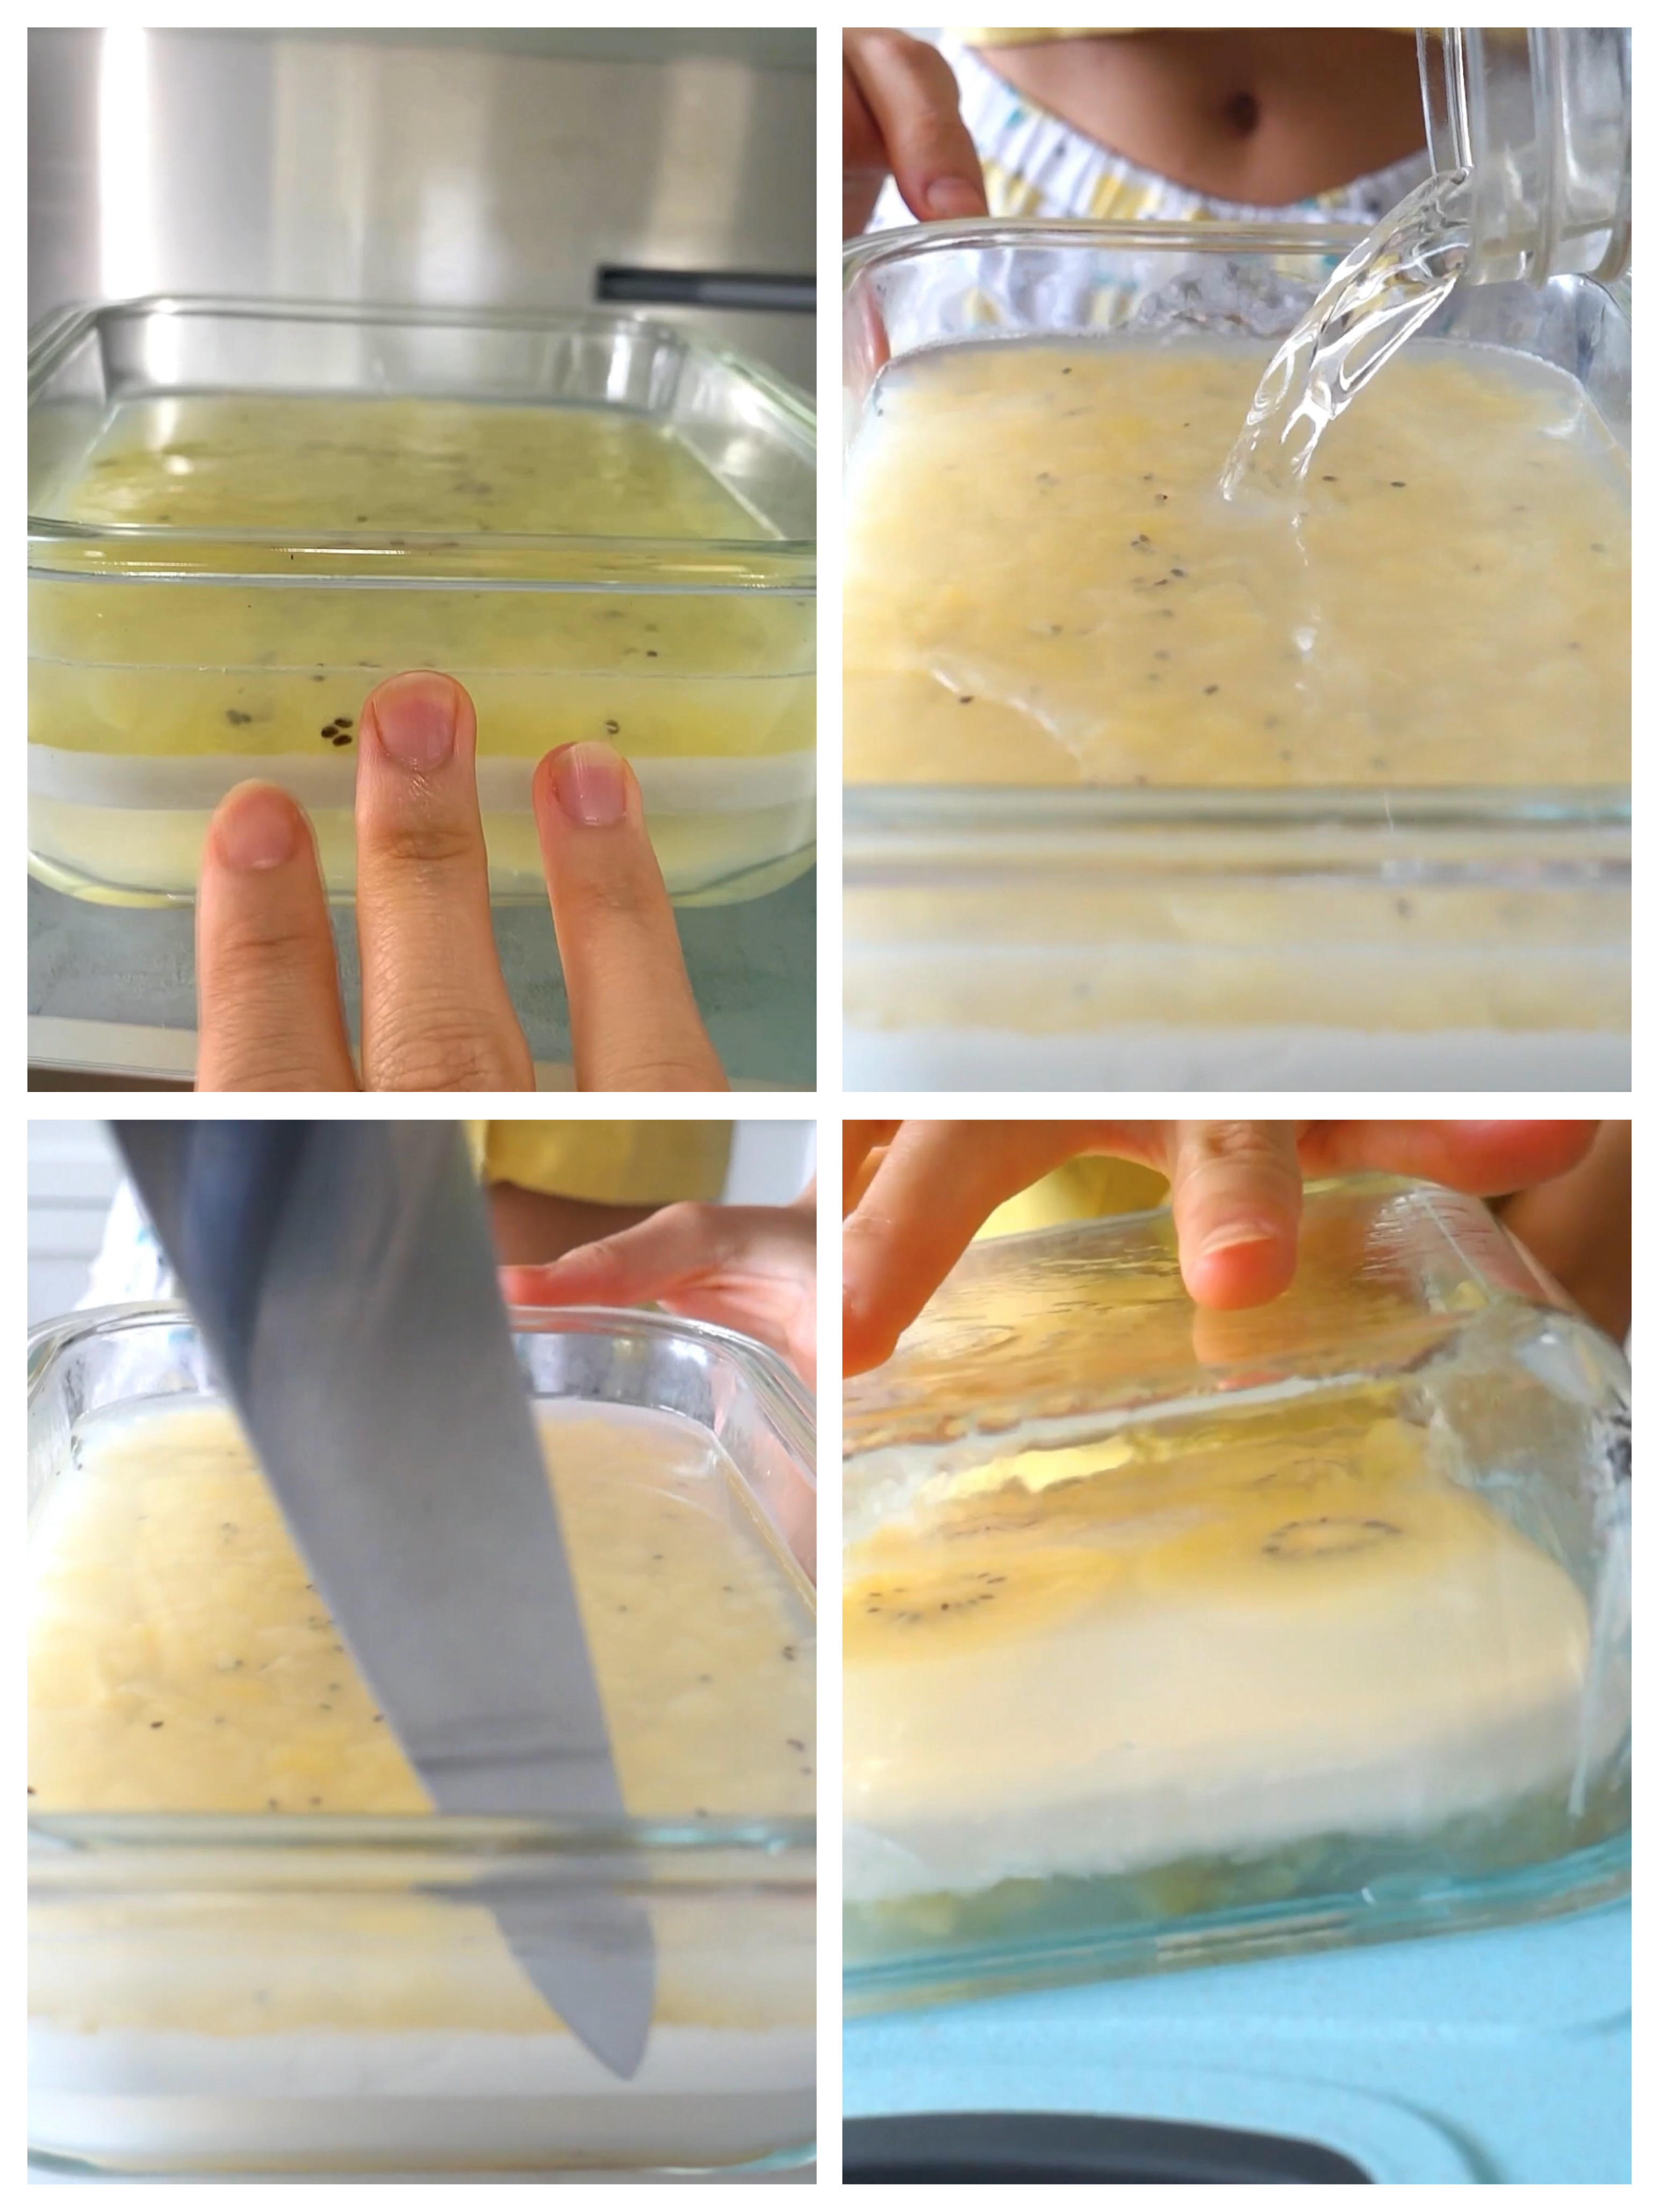
- When you're ready to serve, pour a little cold water into the mold then run a knife along the edges, the water will seep into the sides and help the jelly come out of the mold super easily;
- Flip the mold, the jelly should come straight out, trim off the sides to create straight edges, cut into squares and serve, enjoy!

Popular posts from this blog

Rice Paper Sushi Rolls with Teriyaki Tofu and Veggies

When crispy rice paper rolls and sushi rolls have a baby - then we have something that has the best of both worlds. These rice paper sushi rolls are a perfect combination of earth and ocean, crispy chewy rice paper brings the aroma of the earth, seaweed brings the taste of the ocean, then filled with umami teriyaki tofu, homemade vegan mayo, and fresh veggies. If you ever feel "bored" with your food or cooking, try combining a few things you love and creating something new! These rolls are the kind of magic where 1 plus 1 is greater than 2! They are naturally gluten-free, very well balanced in nutrition with loads protein, carbs, vitamins, and fiber... packed full of flavors and layers of texture. When it comes to rice paper, a very common complaint is "why is my rice paper roll soggy/not crispy/leaking". Well rice paper is a wonderfully versatile ingredient to work with and once you get the hang of it it's super easy to get that golden crispy crust every single

Vegan Napa Cabbage Rolls with Tofu Stuffings

These napa cabbage rolls are almost like vegan dumplings but without having to make any dough. The stuffings are hearty, savory, and "meaty", wrapped in sweet and juicy napa cabbage leaves that are pan-seared to give them a little golden color and charred flavor, and finally dressed in a shiny, umami, garlicky sauce. Cabbage rolls are widely loved in many parts of the world - Central, Northern, Eastern, and Southeastern Europe and much of Asia, as well as parts of North Africa. But of course, they're made differently from region to region. In China, in particular, cabbage rolls are usually made with napa cabbage, as opposed to cannonball cabbage, commonly known as green cabbage. They're then stuffed with minced pork and vegetables and finished by steaming or pan-fring. To make a vegan version, I used tofu, brown rice, shiitake mushrooms, carrot, and scallions but the combination is highly adaptable. This is a perfect chance to use up any scraps of veggies in your fri

Miso Glazed Eggplants - Umami and Addicting

These miso eggplants are seared, glazed, and finally baked to perfection. They're literally bursting with umami, juicy, savory, tenderer than a baby's cheek, and just melt in your mouth. They're definitely a rice-killer - meaning so much rice is gonna be devoured up with this flavorful and addicting dish. But they're also lovely just on their own. Eggplant is one of my absolute favorite vegetables growing up, even during my fussy eating teenager years I never ever turned my back on eggplants. And rightfully so. They have such an amazing texture plus a unique aroma. Scoring the eggplant really helps release the yummy potential of them, the texture will get cooked tender and soft easier and the scored patterns will soak up the sauce and glaze all the way from top to the skin. And if being downright delicious is not enough, eggplant is also a very humble and easy ingredient to use, I can't even imagine how eggplants can ever go wrong. When I was little, sometimes my mo

Vegan Tofu Salmon Rice Bowl with Homemade Vegan Mayo

This mind-blowing tofu "salmon bowl" is my favorite lunch bowl ever and I myself make it at least once a week. Perfectly seasoned and slightly charred tofu "salmon", broken apart and mixed into a bowl of steamy rice, topped with sweet chili sauce and creamy homemade vegan kewpie mayo, and finally all wrapped in a piece of crispy seaweed - it's land and ocean, nutrition and flavor, all in one bite. You might know this bowl as an internet "trend" but for me and I believe many other Eastern Asian kids, it's a childhood memory. I grew up in a coastal city right on the beach and crispy seaweed is a snack our household always had in abundance, they're just so delicious, available, cheap, and actually healthy. And before anyone even had to teach me, I started using crispy seaweed to pick up steamed rice, I’d even skip the chopsticks and just use my fingers to pinch up the rice and whatever I mixed in it for that meal with the seaweed. I love the feeli

Pan Fried Crispy Rice Paper Dumplings with Vegan Fillings

Happy year of the tiger! Dumplings are a must for me on the Chinese New Year, or Lunar New Year and these rice dumplings are the ultimate lazy and easy version. They're stuffed with a savory and "meaty" tofu veggie filling and then pan-fried till golden crispy. And to make the experience even more satisfying, serve them with some sizzling scallion chili oil! Rice papers are such a perfect "cheat" to make easy dumplings. No need to mix flour, knead the dough, then roll out the wrappers, simply dip rice papers in some warm water, cut them into shapes, and start wrapping. The texture is more like the "crystal dumplings" you would get at a dim sum restaurant - the skins would be translucent and chewy and if pan-fried, super crispy! For the fillings, I used a mixture of tofu and vegetables but this is highly adaptable! You can use up any scraps of veggies in your fridge and use any protein base you like - tofu, mashed lentils, or even crumbled tempeh. And i

Shanghai Style Vegan Wontons in Peanut Butter and Chili Oil Sauce

This, is the GOAT of all wontons - sorry to all the other wonton varieties out there I love them all but nothing tops these Shanghai street food style wontons! They are stuffed with umami tofu and colorful vegetables, cooked then chilled, and doused in a luscious peanut butter and chili oil sauce. I hold this recipe especially dear to my heart, as it embodies some of the best memories from my years in Shanghai. Throughout all the ups and downs, growth and growth pains, the street food in Shanghai was the one consistent thing that gave me so much comfort and joy. Scallion pancakes, scallion oil noodles, turnip cakes, soup dumplings, siu mai... but most of all, wontons! Hot steamy wonton soups in the winter and chilled peanut butter chili oil wontons in the spring and summer. The peanut butter and chili oil sauce is without a doubt the soul of this dish. I highly recommend making your own chili oil following this recipe ! It's sooo much more aromatic and flavorful than storebought an

Crispy Rice Paper Dumplings with Tofu Napa Cabbage Fillings and Chili Oil Dip

Literal little satisfaction bombs - these pan-fried rice paper dumplings are golden crispy on the outside, chewy and pillowy in the middle, and filled with savory, juicy, and umami fillings inside. They're also super quick and easy to make, you won't need to make or knead any dough, and all the ingredients in this recipe are naturally gluten-free. There are few heat-intensive recipes I'm willing to make in the current over 100°F weather, and these rice paper dumplings are definitely one of them and they're worth every little bit of effort you put into cooking - the amount of satisfaction is unmatched and it just hits the spot every single time. The fillings are inspired by my previous personal favorite before I went vegan, which is pork and napa cabbages. It was not just my favorite, it's my entire biological family's favorite. Growing up, I have had homemade dumplings frequently on various occasions or just no special occasion at all, and my family is very crea

Teriyaki Tofu with Seaweed Belt (Vegan Teriyaki "Eel")

This easy teriyaki seaweed-wrapped tofu takes little time or effort to make but packs so much depth and flavor! The tofu is cooked to the perfect texture - golden crispy on the outside and tender on the inside then coated in a luscious sauce. You can never go wrong with a good teriyaki sauce and trust me you don't need to buy those premade teriyaki sauces that always contain so much sugar and whatever else. It's so simple to make your own and you can customize your homemade sauce blend to be exactly how you like it. I like mine umami, savory, with a subtle sweetness. This sauce can be used in so many dishes, simple vegetable stir fries, chow mein noodles, or of course, tofu! Whenever I'm using a rich sauce that will get sticky after cooking like this, I always love to coat the tofu in starch and get a crispy crust on them first because they will pick up the sauce so much better and as well as create an amazing contrast between the sticky coat and crispy bite. I also wrapped

Chinese Cucumber Salad - Suo Yi Cucumber

The most fabulous way to cut and present cucumber, ever! This cucumber salad is made of ONE SINGLE cucumber, sliced into a spring shape and dressed in a sweet, sour, and umami sauce, and finally topped with some aromatic and spicy chili oil. Let's please call this dish by its proper name - Suo Yi cucumber, or Suo Yi Huang Gua 蓑衣黄瓜. Suo Yi, means the traditional Chinese raincoat which was made of overlapping layers of straw and sometimes leaves, think a Hawaiian grass skirt but for the whole body. And the "scales" of the cucumber created by a special slicing technique and stretching resemble the layers of straws in Suo Yi, hence the name. And this special way of slicing is not just for presentation's sake! Because of all the incredibly thin, translucent, and flexible slices that this method creates, the seemingly ordinary cucumber is transformed into a form of magic and art! The texture is crunchy yet tender, every single thin "scale" of the cucumber picks up

Gochujang Cauliflower Wings (Vegan Gluten Free)

Sweet, spicy, and sticky, these gochujang cauliflower wings are literally finger-licking good, as in I totally licked my fingers clean after each piece lol. They're coated in a gluten-free batter, cooked in an air fryer for that golden crispy crust, and then coated in a luscious gochujang based sauce. In case you couldn't tell, these gochujang glazed cauliflower wings are inspired by one of my former favorite Korean dishes ever - the sweet and spicy Korean fried chicken! And like the Korean fried chicken, these have just the same kind of crispy crunchy "skin" with a rich sauce that brings together all my favorite flavors into one gorgeous bite, sweet, savory, spicy, tangy... I'm literally reminiscing them already as I type. To make this recipe gluten-free, I used oat flour for the batter and puffed organic brown rice instead of panko bread crumbs. They turned out just as crispy if not more, the puffed rice added such a nice crunch to the crust! For cooking, you ca